
Planning and Installing Your Suspended Ceiling System

Are you looking to upgrade your home or office with a custom drop ceiling? A suspended ceiling system can be a great solution for adding a touch of elegance and sophistication to any space. In this article, we will guide you through the process of planning and installing a drop ceiling system, using our high-quality metal ceiling t-grid and suspension wires. We will also touch on making a custom wood ceiling with wood panels and suspension accessories from CW Woodcraft.
Gathering the Panel Layout Information
Before you start the installation process, it's important to gather all the necessary panel layout information your drop ceiling will need. Begin by measuring the dimensions of the room to ensure accurate measurements for your suspended ceiling. This will help you determine the quantity of panels and accessories needed for the project.

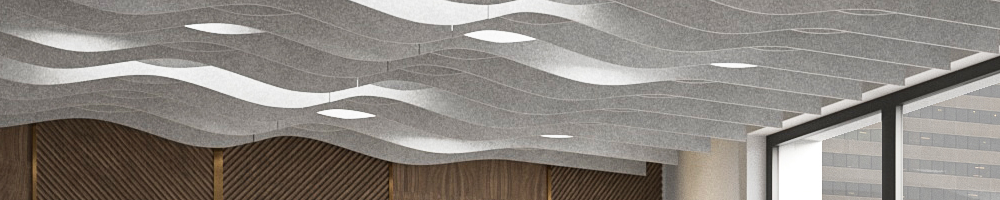
Next, consider the desired size and placement of the ceiling panels. CW Woodcraft offers a wide selection of acoustic wood panel designs that can be used as custom wood ceilings. It's essential to align the grid with the wood panel assembly, allowing for secure installation using screws through the backer strip into the grid. To achieve a symmetrical and balanced look, it may be necessary with some panel designs to make sure that the border panels are the same size and opposite on each side of the room.
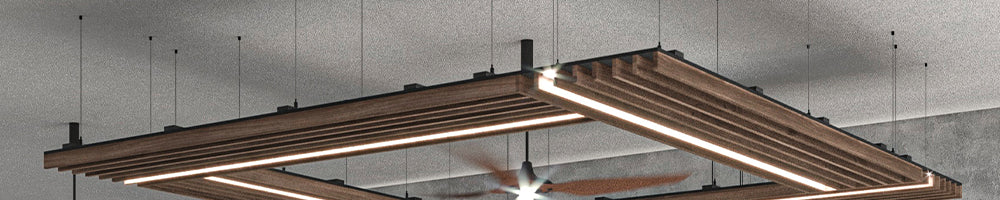
Design your own custom wood ceiling panels effortlessly with CW Woodcraft's user-friendly tool. Choose size, finish, spacing, panel attachment or cable suspension system, and even lighting integration. Visualize the rendering on wall and ceiling, and access plan view with dimensions for seamless installation. Explore at CW Builder® Design Tools | Wood ceiling & Wall Panels (cwwoodcraft.com)
Let's begin installing the metal grid ceiling

Installing Wall Molding

To start the installation process of your drop ceiling, let's get that wall molding in place! First, mark the desired ceiling height on the wall. You want to make sure you measure accurately, taking into account the height of the wall molding above it. Don't forget to also consider the thickness of the wood panel design or any attachment accessories you might be using. We don't want any surprises later on, especially with your custom wood ceiling!
Draw a level line around three walls and use a string line for the fourth wall. Attach the wall molding to the wall studs using appropriate fasteners. For solid walls where direct nailing is not possible, you can use hanger wire as a substitute for wall molding.
To view information on the suspended ceiling systems and attachment accessories, including pricing and ordering, refer to our attachment and suspension hardware collection.
Hanging the wire
To properly install hanger wire for a ceiling, here's a step-by-step guide:
-
Snap a chalk line: Start by marking the main beams using a chalk line. Make sure to space them 4 feet apart, providing a sturdy framework for your ceiling.
-
Secure the wire fasteners: Screw in or attach the wire fasteners along the chalk lines, maintaining a 4-foot spacing between each fastener. These fasteners will hold the hanger wires in place.
-
Wrap hanger wires securely: Take each hanger wire and wrap it around itself three times. This ensures a strong hold and prevents the wire from slipping later on during installation.
-
Nail above the molding: Measure up 7/8" from the bottom of the molding and drive a nail into the wall slightly above the molding on each side of the room. These nails will be used as reference points for creating a straight line.
-
Create a reference line: Stretch a string tightly from one nail to the other along a row of wires. This string will serve as a straight reference line guiding the installation of the hanger wires.
-
Bend the hanger wires: With the string in place, bend each hanger wire at a 90 angle where it intersects the string. This ensures that the hanger wires will be level and properly aligned with the reference line.
-
Pre-bend the remaining wires: Use additional strings to pre-bend the remaining hanger wires. This process allows for a more even and level installation of the ceiling. Once all the hanger wires have been pre-bent, you can remove the leveling strings.
By following these steps, you'll be able to install hanger wire for your drop ceiling securely and accurately, creating a stable base for your ceiling materials.
Hanging Main Beams

After installing the wall molding, it's time to hang the main beams. Trim the end of the first main beam to create the proper border tile opening. Use tin snips to cut the top of the grid, then bend it open and cut the face of the grid. Place the cut end of the main beam on the wall molding. Hang the main beams on the hanger wire or hook perpendicular to the joists.
To ensure a precise fit, use premium ceiling grid products, check out our C.W. Woodcraft XL 15/16" Exposed Tee System. This system provides a sturdy and secure foundation for your drop ceiling system.
Square the Grid

To ensure a square grid, insert the second cross tee on the right side of the already installed cross tee slot when connecting two cross tees in the same rectangular hole of a main beam. Start by installing two 4' cross tees between the main beams, aligning them with the first two border tees. Measure the diagonals of the 2' x 4' opening to confirm that the grid is square. Adjust one of the main beams if needed to make the diagonals equal.
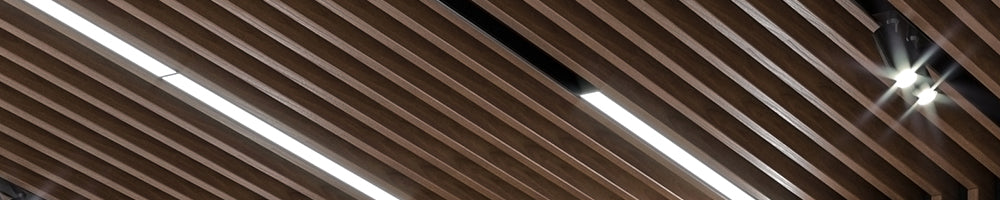
For a varied and stylish look with a custom wood ceiling, consider our linear wood panels with wood backing collection. These panels can be incorporated into your drop ceiling system to add a unique touch to your ceiling design.
Installing the Remaining Grid and Leveling the System

After squaring the grid, you can now proceed with installing the remaining grid. Hang the first two rows of main beams and join their ends together for a secure connection. Cut the ends of these rows to fit the wall molding at the far end. Use the leftover ends of the cut main beams to start additional rows. Cut additional border cross tees to fit between the wall and the first row of main beams. For a seamless installation, consider using our acoustic linear wood panels that not only provide visual appeal but also enhance sound quality in the room.
Once the grid is fully installed, it's important to check and ensure that the system is level. Use a level tool to do this and adjust any uneven areas as needed. Taking the time to properly level the system will ensure that the ceiling tiles fit correctly and provide a seamless and professional finish to the installation.
For your convenience, we offer a range of attachment and suspension hardware options to help you securely install your drop ceiling system.
Final Level

To begin the final leveling process, attach a magnetic level to one of the main beams located in a corner of the room, making sure it is resting on the wall molding. If you've used traditional hanger wire, it should already be level. However, if further leveling is needed, carefully untwist the hanger wires and adjust the grid's height slightly by raising or lowering it. Afterward, re-bend and twist the wires to secure the grid in place.
Starting from the corner of the room, meticulously inspect and level each cross tee and main beam until the entire system is properly aligned. This will ensure a straight and even installation for your ceiling.
By following these steps and utilizing our high-quality wood panels and accessories, you can plan and install a drop ceiling system that will transform the look and feel of your space. If you are making this a custom wood ceiling, don't forget to take advantage of our sample program by requesting samples of our wood panels from our order samples page, so you can see and feel the quality of our products firsthand.
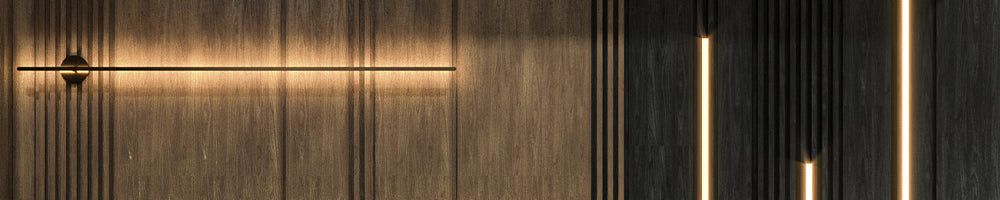
For your lighting needs, consider our U-Lux Max Magnetic Lighting System Modules. These modules can be easily integrated into your drop ceiling system, adding a stylish and functional touch to your space.
For more information and inspiration, be sure to explore the various collections and products we offer at CW Woodcraft. Whether you're looking for partition walls, acoustical ceiling baffles, or attachment and suspension hardware, we have everything you need to create a stunning drop ceiling system for your home or office.
With careful planning, precise installation, and the right materials, you can achieve the drop ceiling of your dreams. Start planning your drop ceiling system today and elevate the style and elegance of your space with CW Woodcraft.
Conclusion
In conclusion, planning and installing a drop ceiling system can enhance the elegance and sophistication of any space. With CW Woodcraft's high-quality metal ceiling t-grid, suspension wires, wood panels, and suspension accessories, you can create a stunning and functional drop ceiling. From gathering panel layout information to hanging the main beams and leveling the system, careful planning and precise installation are key. Explore CW Woodcraft's attachment and suspension hardware collection to find the perfect accessories for your drop ceiling project. Visit here to browse the collection. Elevate the style of your space and transform it into something extraordinary with CW Woodcraft.